Just prior to Christmas, I was gifted a model railway. Not something I ever thought I’d take seriously, but here we are a few months later and I can safely say I’m hooked.
Specifically, it was the intersection of microcontrollers, automation and electronics that piqued my interest. Building things that move, with some vague sense of reality.
I’ve neglected to write up much of my progress so far, as I try to get to grips with the most basic terminology. It’s a ‘double-O’ gauge, which means 4mm is a foot in real life. Control-wise, it’s a fairly basic kit. Power goes in, train moves. But as I get to grips with the possibilities, I thought I’d write up some notes here.
Choo-Choo
The power supply is fairly straightforward. 12v DC (actually a bit higher) is supplied to one track, and return on the other. The train picks up the power via its wheels and uses this to drive the motor, which makes it go round. Drop the voltage a bit and the train slows down. Reverse the polarity and it reverses.
Given the whole track needs to be powered at once, with some losses between the connection and the train, it’s often a bit higher than 12v.
I have 4 locomotives to play around with, and a variety of carriages. This creates the first challenge. Stick a couple of trains on a loop and they’ll invariably go round together. One will be faster/lighter/geared differently to the other so invariably at some point they’ll mate or crash.
One solution to this is a system called DCC, which uses pulse-width modulation to send data alongside power to individual trains. This requires some extra smarts on each train and – while you can retrofit them – it all sounds a bit fiddly.
The cheaper solution
Actually I’m not sure this is cheaper in the long run, but bear with me.
One thing I’ve learnt very quickly is that model trains (particularly the locomotives) are expensive. I’ve no doubt that’s because of the delicate electronics inside. For my stage of learning though, I’d prefer cheap second-hand over whizzy brand new. Besides, where’s the fun in buying a ready-made solution when you can reinvent the wheel make it yourself?
Signals
First thing’s first, I want to have signals. A simple red/green set at first; we can improve on this later.
To the surprise of presumably nobody, red means stop; green means go. A simple two light (or aspect) signal should be enough to get us going (or stopped…). There are more complex light combinations, including single yellow, double yellow, and even exotic flashing lights, but let’s keep it basic for now.
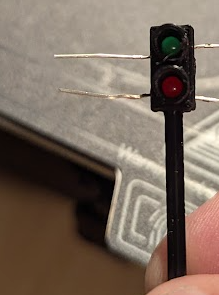
With a couple of LEDs and a 3d printed signal structure, I’ve got the starts of a signal.
A few more printed, and some indelicate soldering, and I have several signals ready to go. To control, these, I create a prototype board with some switches and wire them up.
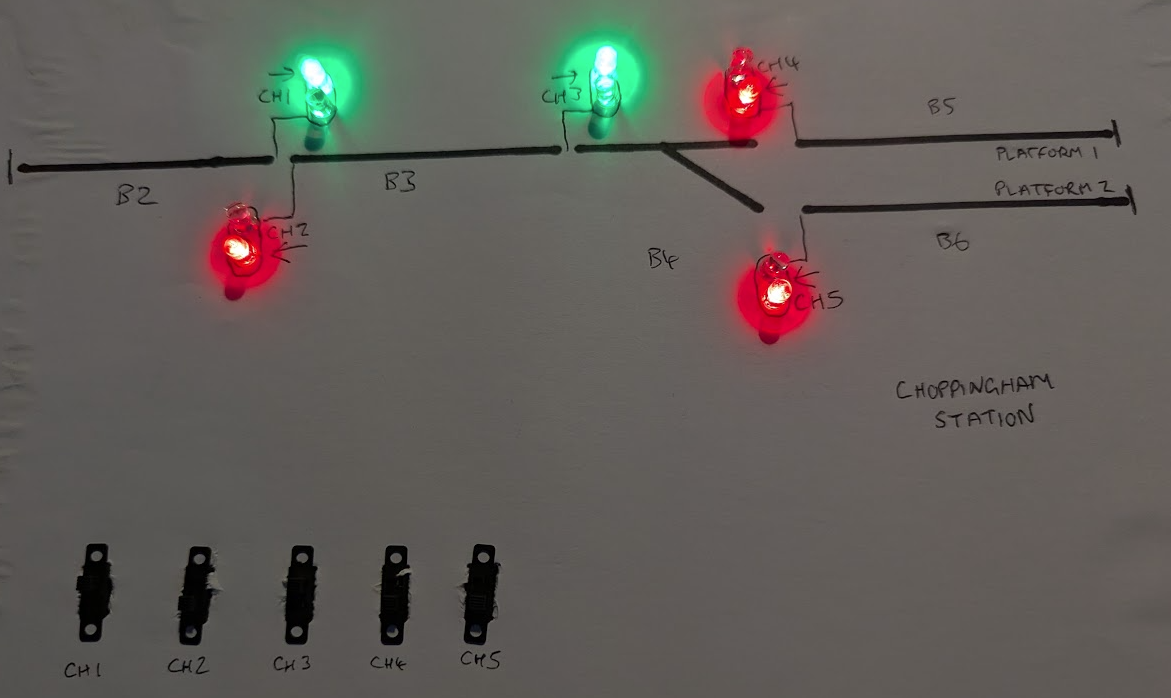
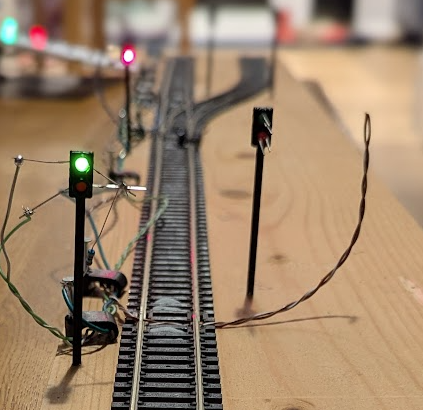
With all five signals in place, I could control them individually. Concept proven, it’s on to microcontrollers (a future post…).
Moving Trains
Getting trains to move proved a little tricky at first, and here I learnt very quickly how small motors deal disproportionately with physics, namely friction & inertia. The best I can put it is this: compared to their full-size equivalents, model trains start and stop abruptly.
It can seem quite unrealistic, and it also seems model rail people (modellers?) spend quite a bit of time trying to overcome this. I’m not sure if DCC manages this well.
The track on a basic model railway is electrically continuous. Little metal connectors ensure power is transferred between successive pieces of track and the train can run between them. However, this also means all trains run the same way at the same time.
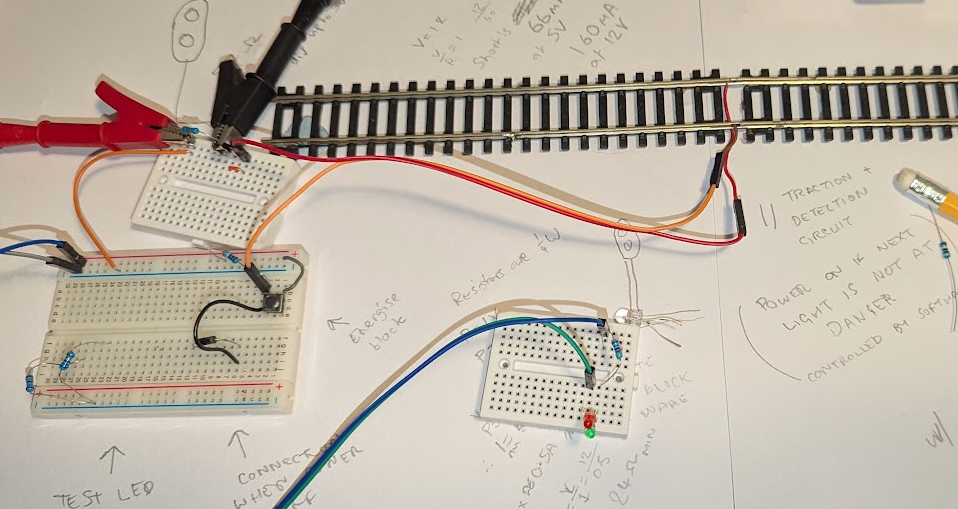
To get my trains moving with some degree of control I broke the track down into blocks. This is somewhat similar to real-life railways, although in that sense ‘blocks’ are more for signals than powering trains directly. Still, for most activity it’s not too dissimilar a concept.
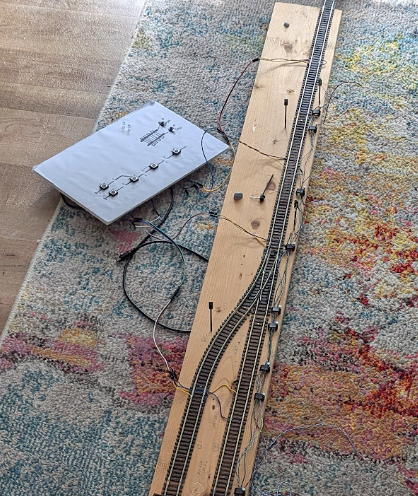
To get my trains in motion, I wired each block separately. At a push of a button, I could energise each section of track and any train on it would move accordingly.
It was crude, fiddly, but – damnit – it worked.
Next Steps
As far as power and signals are concerned, I managed to establish a way forward quite quickly.
I’ve now got both power and signals controlled by microcontrollers, meaning I can (for instance) set signals via a web interface, start and stop trains, and even control their speed.
This is a lot more advanced than I’ve documented so far, so my plan is to write up each stage as I reach a milestone.
If you’re interested in more, please consider bookmarking this site!